Learn how to make this easy from scratch active Sourdough Starter in my detailed tutorial. An active Sourdough starter is the essential building block for making Artisan Bread and much more.

My family is nuts about my homemade crunchy sourdough breads, but its not just the breads. They love my sourdough pancakes, sourdough waffles, sourdough bagels, muffins, cinnamon rolls and the list goes on….
We are a bread eating family, well except my second son. He takes the bread off of every sandwich I make him. He prefers wraps so I make sourdough tortillas.
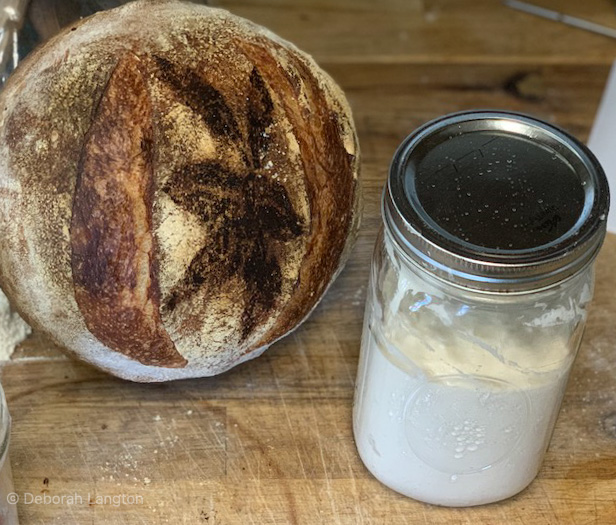
These crunchy loaves of Artisan bread don’t last long around here. I made the one above Saturday morning before I left and it was gone within 24 hours.
My bread recipe is such an easy no fuss recipe that I don’t mind that it gets eaten so fast.
I didn’t spend a bunch of time kneading it. All it takes is a few minutes at night to mix 4 ingredients and set it aside till the next day to bake. Check out my Easy Artisan Sourdough bread here.
Good sourdough bread starts with a healthy and active starter. Here I will give you the basics and important tips to making a healthy starter that will give you years upon years of healthy breads.

This post contains affiliate links, which means I make a small commission at no extra cost to you. See my full disclosure here.
Easy Tips For a Healthy Sourdough Starter
- Don’t neglect it. Sounds simple but it happens often. This is especially important in the beginning. Once you get an active starter, it can sometimes take a beating and keep on kicking. But don’t go overboard on this
- Set a time to keep from forgetting to feed it
- If you can get a few tablespoons from a friends starter, it will give you a jump start. Alternatively, you can order starter inoculants to get your starter going faster. My favorite site Cultures For Health has cultures of every kind, from sourdough to kefir
- Use good quality ingredients. Do not use tap water or bleached flour. The chemicals in tap water can kill the natural yeast and the bleached flour will already be sterile. You want natural wild yeast to grow in your starter.
- In the beginning, vigorously stir the starter to incorporate more air and wild yeast that is in the air.
- I change my container once a month or so, just to clean up the dried on bits. You can change your jar every feeding if you want, or once a month like me, it’s really personal preference.
Easy From Scratch Sourdough Starter Ingredients and Supplies
- Distilled Water
- All Purpose, Organic, Unbleached Flour
- Sourdough Inoculation Starter, like this one by cultures for health (optional but can give you a jump start)
- Glass Storage Container, I use the medium container most of the time, unless im bulking up for a big baking day. Then I transfer my starter to a medium pyrex bowl.
- Whisk
- Rubber Spatula
- Lid
Directions
Day 1: Getting Started
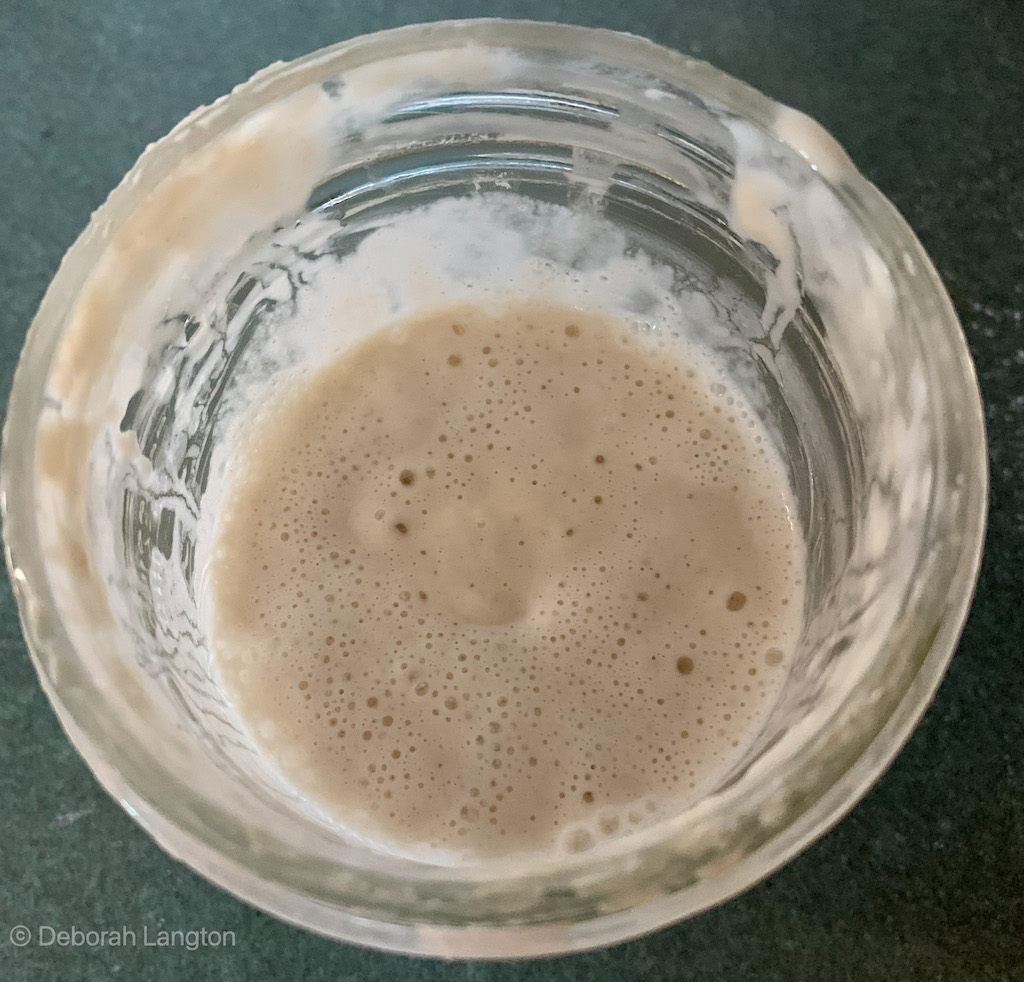
Measure 1/4 cup (25 grams) of All Purpose Flour into a mason jar or small glass bowl. Also measure 1/8 (25 grams) cup distilled water into the same bowl. Whisk all ingredients together vigorously. Scrape down the sides to keep your container clean.
The flour will dry out and get crusty on the sides if you don’t. This isn’t the end of the world but I like to keep things clean.
Cover your jar loosely with a lid. If using a large bowl you can simple put a plate over the top.
The point here is to keep debris out but allow oxygen in and gasses to escape. Ive used each of these options at different times.
Set it aside, somewhere out of the way but in a warm place. You won’t see any visible action this day.
*As a side note, in the past I have weighed my starter. I don’t find this extremely necessary but for those who need things to be exact, just use equal parts, 1:1 ratio, 25 grams of flour and 25 grams of water.
Day 2: Repeat
Day two is simple and easy. Open your jar and add another 1/4 cup of All Purpose unbleached flour and 1/8 cup of Distilled water. Vigorously whisk them together to incorporate some oxygen and wild yeast. Scrape down your sides, cover and set aside. Thats all for day two.
Day 3: Discard Day
To keep from having sourdough starter overflowing your jar, you will need to discard half of it. Trust me here, you don’t want to keep doubling your starter. It feels wasteful but its necessary.
Composting is a great way to repurpose the discards or I feed it to my chickens. Discard 1/2 of your starter. I just eyeball this but if you are weighing your ingredients, discard 50 grams.
If you see action today don’t get too excited. There is a battle going on in your jar between good and bad bacteria and yeast and you need to complete the whole 7 days to give the good bacteria a chance to win that fight.
Just like Day 2, add 1/4 cup (25g) All Purpose flour, and 1/8 cup (25grams) distilled water. Vigorously stir, cover and set aside.
Day 4, 5, 6, and 7: Discard and Replenish
The next 4 days you will do the exact same as you do on day 3.
However, now you will increase that to twice a day, morning and evening.
Discard half, and replenish your starter when you get up in the morning and then again before you go to bed at night.
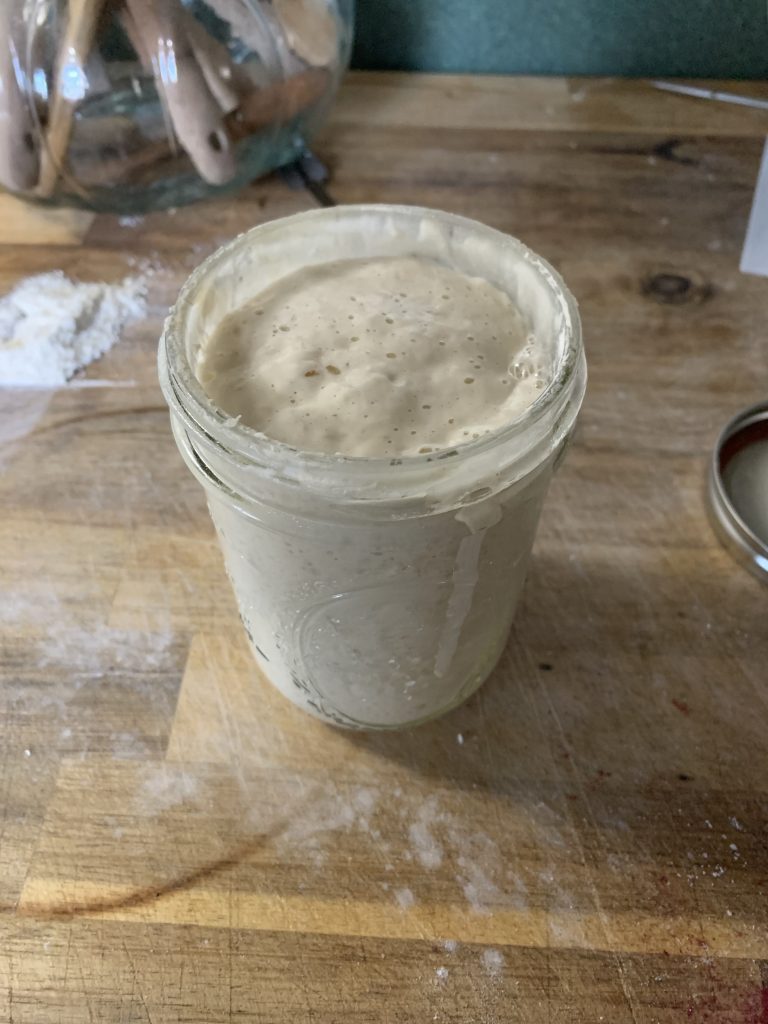
You should start to see bubbles in your starter and eventually you will see it rise by the end of the day.
If this happens sooner you can feed it sooner. It’s like a newborn at this stage, you feed it when it’s hungry not necessarily on a schedule.
By day 7 you should have a pretty good starter going. However, at this point most starters aren’t quite mature enough to really give you a good bread rise. This will happen closer to day 14.
Even though your starter isn’t ready for a boule’, there is no need to waste all that starter discard anymore.
Your good bacteria and yeast have now won enough of the battle to produce some desired rise in other sourdough foods.
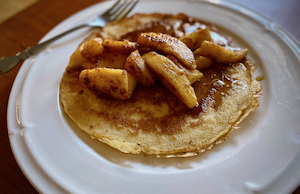
For ideas that use up your discard check out my Zero Waste Sourdough Discard Pancakes. My kids get so excited when I make these.
Low Maintenance Storage
Once your starter is good and active and you’ve made all the loaves of bread you and your family can take, or your just tired of feeding this new pet two or more times a day, you may begin to wonder how to store your starter for the short and long term.
- For short breaks, feed your starter and store it in the back of the refrigerator. The cold temperatures slow down the yeast and bacteria, but they do not stop it completely. Your starter will continue to ferment. However, I have left me starter closed up in the back of my fridge for 6 months or more and when I pulled it out and revived it for a day or two, it was back to full rising activity.
- Dehydrate your starter. This is a great way to preserve your starter for the long term. However, it’s incredibly important that you do not dehydrate it with heat. Heating your starter will kill the good microbes. Its best to dehydrate your starter on a parchment paper lined baking sheet, spread thin, at room temperature. This can take a few days. Store it in an air tight container or ship it to a friend.
- Lastly you can freeze your starter. Thats right! You can freeze it. Similar to the refrigerator method, the yeast and bacteria will simply go to sleep and once you thaw it and begin feeding again your starter will become active and lively again.
Warning: Your Sourdough Starter could experience this.
If your starter begins to separate when stored in the refrigerator and you see liquid on top, this is called hooch. It’s completely normal when not fed but should be avoided.
Hooch causes your starter to become sour and can give some undesirable off flavors. It can even smell like fingernail polish remover (acetone).
What has happened is your good bacteria and wild yeasts have run out of food and have started to die off.
Do Not Despair your Easy Sourdough Starter isn’t ruined
However, do not despair if you see hooch. Even if you see grey or almost black hooch, your starter can be revived.
The first thing you need to do is pour it off. Try to pour off as much as you can to prevent the off flavors being mixed back in.
Then you will need to feed your starter a few times over the next few days to revive it enough to bake with.
Confession Time
#1- This last year, when I was pregnant and exhausted. I had very little energy and we survived off of pre-made meals.
I stuck my starter in the back of our fridge, on the top shelf where its coldest, and forgot about it for probably my entire pregnancy.
About a week ago I pulled it out and fed it twice a day for a few days and now its so active it wants to be fed 3 times a day.
#2- I do not measure exact quantities when it comes to my sourdough starter.
Truth be told, I just make sure my starter is thick. I go more by feel.
When I first started out I used to weigh everything, but now days I just need to get it done.
Comment below with your favorite Sourdough recipes or what recipes you would like me to write about.
More Sourdough Recipes from our Farmhouse Kitchen
Zero Waste Sourdough Discard Pancakes
Classic Artisan Sourdough Bread
How beautifully presented and easily conveyed, Deborah! Your bread making reminds me of Marietta.
Did you know Grandma Brusseau won awards for her bread!! I’m sure you did.
Love your site.
Will be watching you, girl🍞🥖🥐
Lord, bless Deborah’s desire to loaf around!
Actually, I didn’t know that. I would love to include any recipes of hers you might have on my site.
Great job on the blog! Can’t wait to see more
Thanks Trent