Learn how to make professional quality Sourdough bread with my Easy No Knead Artisan Sourdough Bread tutorial and recipe.
I will walk you step by step through this simple process and teach you the secrets to making delicious crunchy and airy Sourdough loaves.
My love for sourdough breads is no secret. Not only does it taste like professional high quality bread that you spent all day working on, but its also so much healthier for your body than anything you can buy at the store.
In our house, this bread is usually gone in a 24 hour period. From sandwiches to snacks, its just so tasty that we tend to grab a piece every time we pass by.
Have I gained a pound or two from this deliciousness? Maybe, an unfortunate side effect of not having a lot of self control when Artisan Sourdough bread is around. I blame it on my Italian Grandma. She loved her buttered breads and pastas. Ever heard the saying, never trust a skinny chef? We’re gonna go with that here.
I will give you all my tricks to making my crunchy and airy sourdough bread with those amazing air pockets that are great for every kind of eating, from sandwiches to sopping up that last bit of sauce on your plate. Im getting hungry just talking about it.
This post contains affiliate links, which means I make a small commission at no extra cost to you. See my full disclosure here.
Tools needed for Sourdough Bread
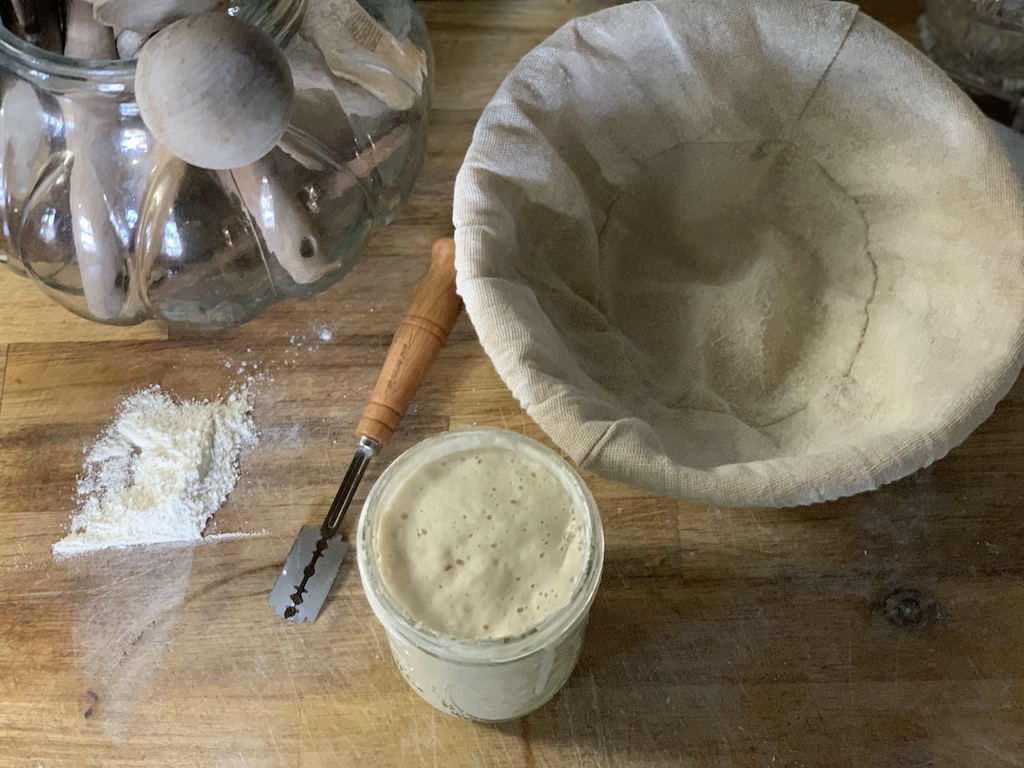
- Banneton Proofing basket, I bought this kit which includes most of what you will need to make beautiful artisan loaves, but for the longest time I just used glass mixing bowls.
- Razor, included in the kit , for scoring (cutting the dough to guide it where you want it to expand)
- Sourdough Whisk, also included in the kit
- Parchment paper– this helps during transfer and also helps prevent the bottom from burning. I specifically like the round type and this brand is silicon free, 100% wood pulp, and biodegradable.
- Dutch oven– I was gifted this one and absolutely love it. It cleans up well too, better than my cuisinart Dutch Oven in the same color.
Ingredients
Sourdough Starter, check out my Easy Sourdough Starter Tutorial here.
Organic Bread Flour
Distilled Water- you do not want to use tap water straight from the faucet. The chlorine can kill your culture.
Sea Salt, I use Redmonds Real Salt because it has its original minerals intact
Instructions for No Knead Artisan Sourdough Bread
Step 1: Preparing your starter
If your starter is being stored in the fridge, the day before you are going to make bread, take your starter out of your fridge, discard half and feed it.
Do this again that night, and then again the next morning. By the second night it should be awake and active. You want it at top performance.
Your starter should double itself within 4 hours of feeding it.
If you have been keeping your stater on the counter and regularly feeding it, you can skip this and go straight to step two.
Step 2: Mixing the No Knead Artisan Sourdough Bread
In the evening, I do it after the kids are in bed, weigh your sourdough starter, salt, and water in a medium sized bowl and whisk together.
Next add your bread flour and whisk with your dough whisk just until combined.
Set it aside for about 30 minutes. This is called Autolyse and allows the flour to fully absorb the moisture and gluten bonds to form.
Step 3: Stretch and Fold
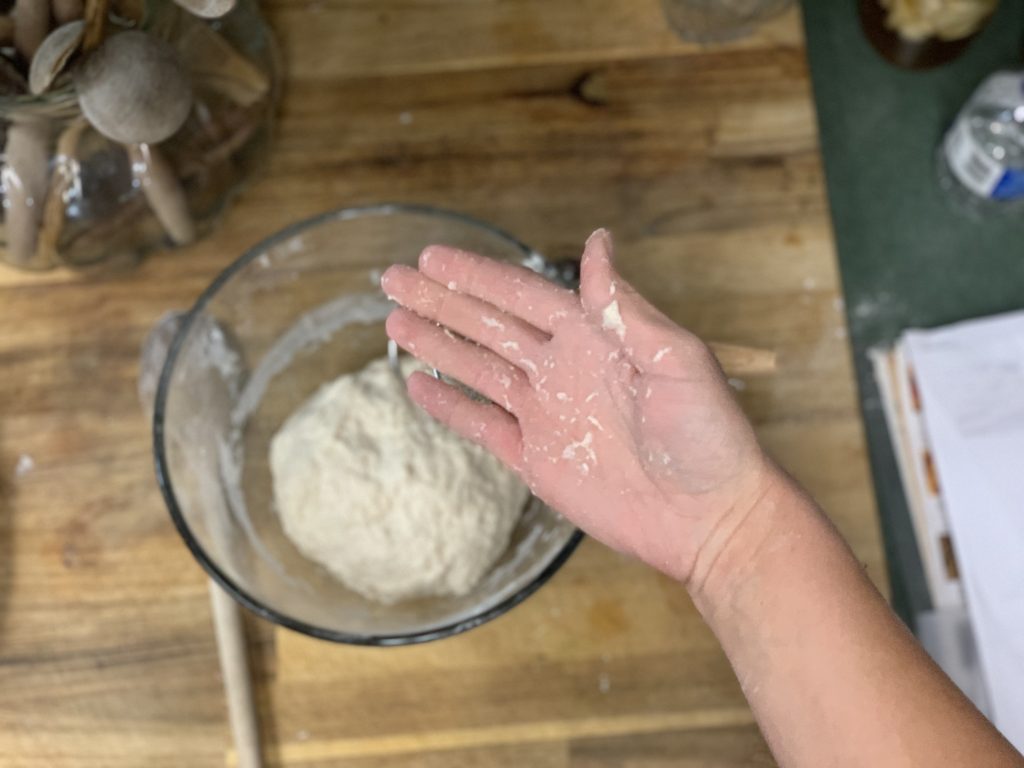
After about 30 minutes has passed, working inside your bowl, stretch and fold your dough 4-5 times.
Your dough will be slightly wet but not difficult to work with. I end by forming my dough into a nice round ball.
Cover your mixing bowl and set aside in a warm place overnight. Your dough should double in size during this overnight rise/ferment.
Step 4: Preheating your oven and Preparing your boule’
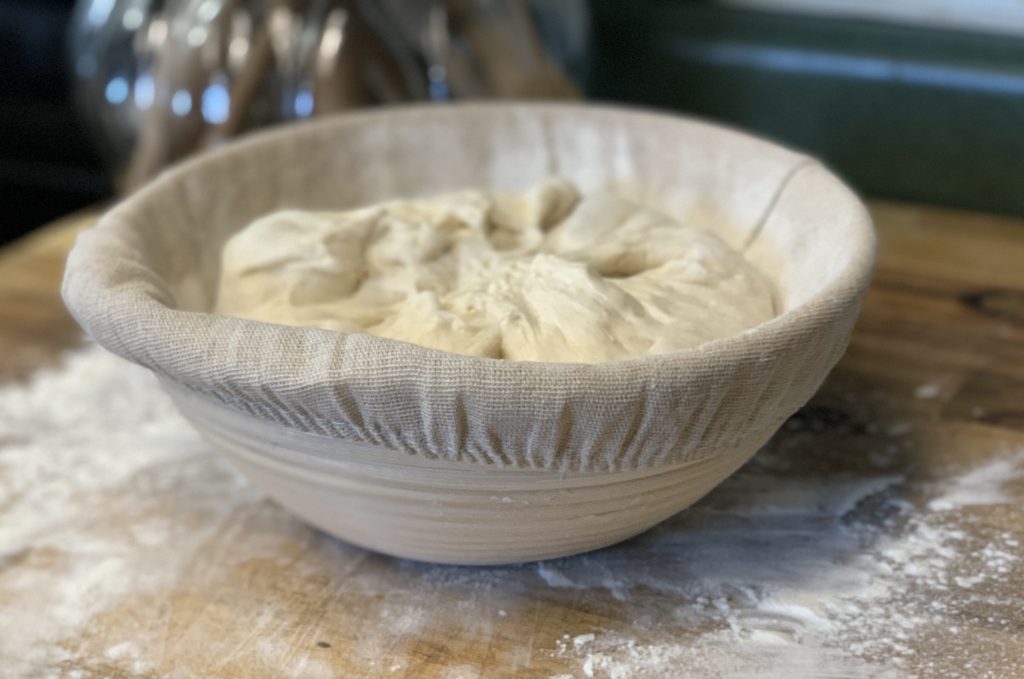
The next morning, after your boule’ has fermented for 8 hours, Ive gone as long as 14 hours, scrape your dough out of the bowl and onto a floured work surface, being careful not to disturb many of the air pockets that formed overnight. Do Not punch your dough down.
Shape your dough by gently pulling it towards you while tucking the dough with your hand and rotating.
Repeat this until you have gone around the dough a few times. This forms your dough into a nice round boule’.
Gently put your dough top side down into your banneton and cover for 30 minutes. Be careful that you do not go over 30-45 minutes. This is your last rise before you bake.
While your boule’ is proofing, Preheat your oven to 475 degrees Fahrenheit with your Cloche or Dutch oven inside. You want it to heat up as your oven heats and the 30 minutes gives your baking vessel plenty of time to heat all the way through.
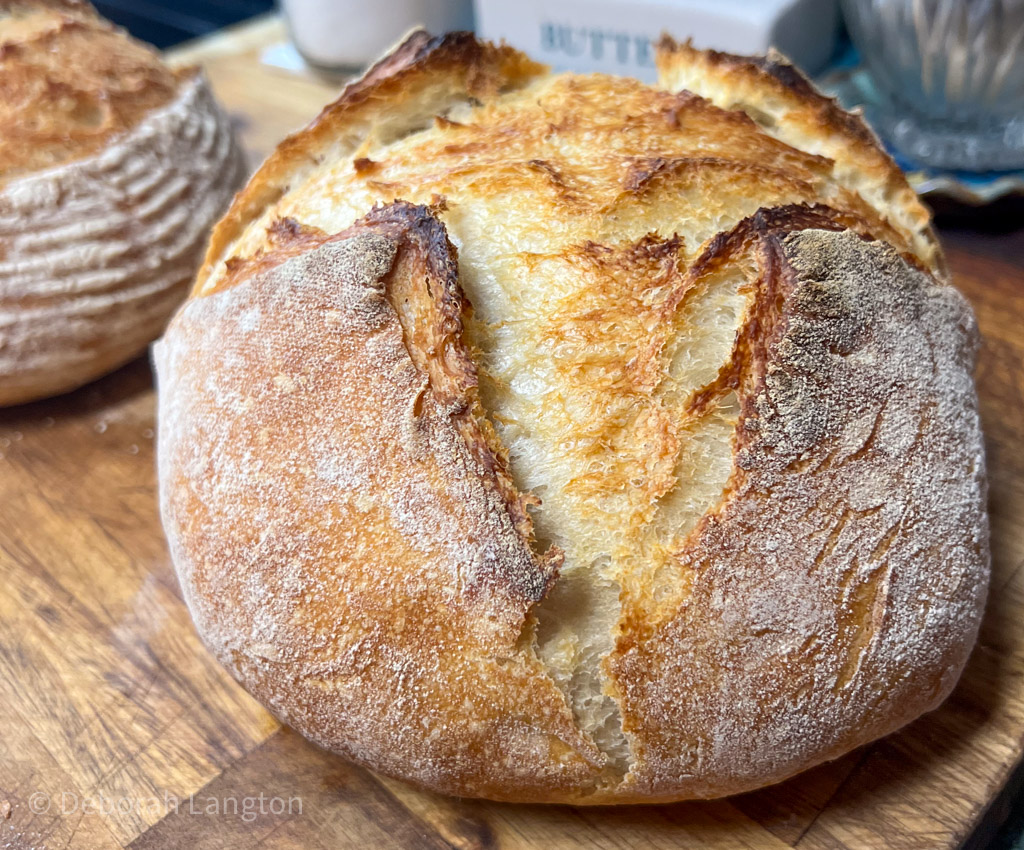
Step 5: Score and Bake your Easy No Knead Artisan Sourdough Bread
Once your oven and dutch oven have fully preheated and your boule’ has proofed for 30 minutes, it is now time to decorate and bake your bread.
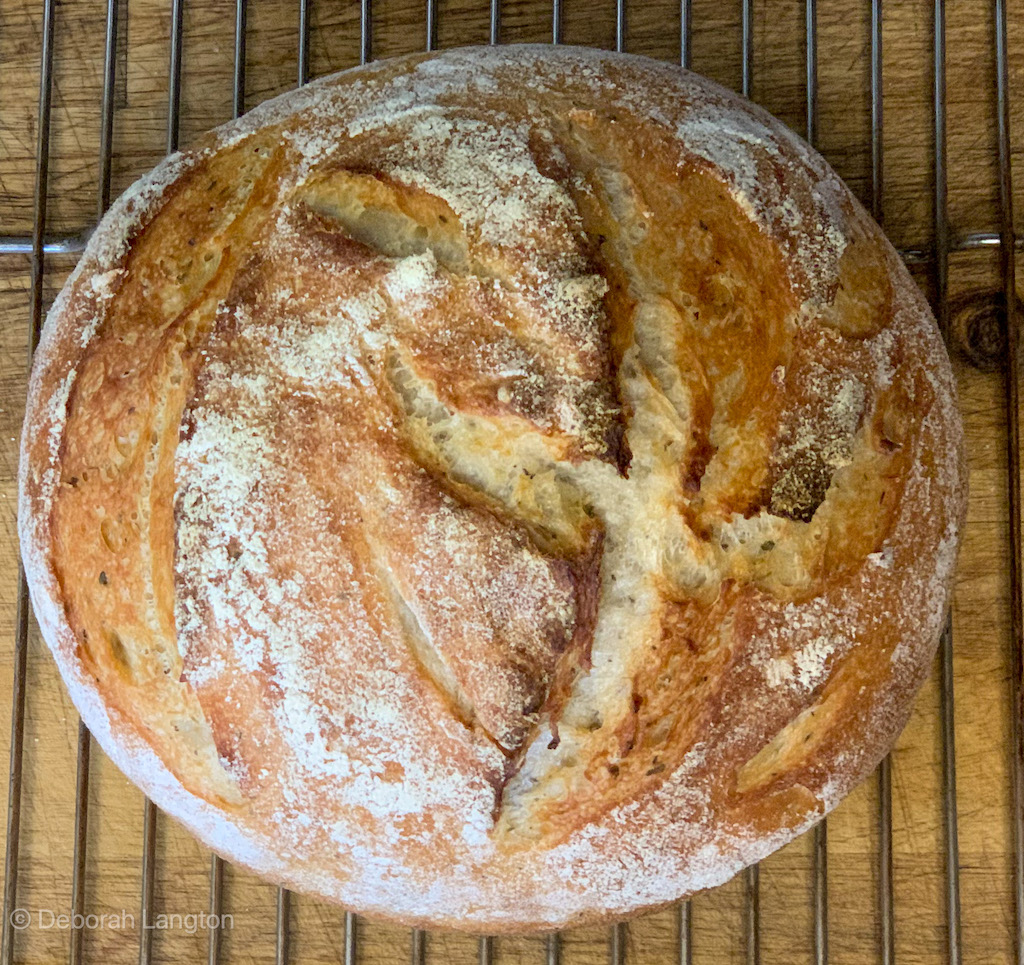
Flip your dough seem side down onto parchment paper. Score your loaf. I use the lame that came in my kit to score my bread and the stencil to create a beautiful flower on top.
Carefully remove your hot dutch oven from your oven and place your boule’ inside. Replace your lid, and put it in the oven to bake.
Immediately lower your temperature to 425 and bake for 20 minutes covered. Then remove the lid, and bake for 15-25 more minutes.
Carefully remove your bread from the oven and turn over onto a baking rack to cool completely before slicing. Store in a bread bag or ziplock bag to keep fresh.

Tips for Easy No Knead Artisan Sourdough Bread
- I prefer to use rice flour the morning after my long proof. At this point my bread will no longer have time to ferment and the rice flour is gluten free. It also helps to prevent sticking in my banneton proofing bowl.
- A thin cotton kitchen bowl works great inside my banneton.
- I proof my dough overnight inside my turned off oven with the light on. The light gives just enough warmth for the dough. This is especially important during winter months when the air tends to be dryer and cooler in our homes but I will also do this in the summer sometimes. Just don’t forget you put it in there and turn your oven on.
- Using parchment paper helps to keep your surface clean and also helps to safely transfer your boule’ to your hot baking dome or crock. I prefer not to use it because I like the crust better when the dough is in direct contact with the hot baking surface.
- There are tons of beautiful scoring designs online so take some time to google simple ones to start with and practice. The kit I recommended also came with a stencil. Ive been experimenting with different plant based colorful flours, such as beet flour and chaga flour, to create beautiful reds and green colors on top.
- Scoring your bread helps with oven spring and can actually encourage an under proofed loaf to rise better.
Share my recipe with your friends and comment below any ideas of recipes you would like to see more of.
More Recipes from our Farmhouse Kitchen
Easy Sourdough Starter Tutorial
Sourdough Cranberry Orange Loaf
Pumpkin Pie Sourdough Artisan Bread

Easy No Knead Artisan Sourdough Bread
Learn how to make professional quality Artisan Sourdough bread with my Easy No Kneed Artisan Sourdough Bread tutorial and recipe.
Ingredients
- 500 grams Bread Flour Organic
- 285 grams Distilled water (room temperature)
- 10 grams Redmonds Real Salt
- 100 grams Bubbly Active Sourdough Starter
- Optional Add-ins: Herb de Provonce or Italian Seasoning, Garlic Powder
Instructions
- Measure 100 grams of Active Bubbly Starter into large Bowl, with 285 grams of water, by weight. Whisk Together.
- Add 500 grams of Organic Bread Flour and 10 grams of salt to the bowl with the starter and water. Add optional herbs now if you are using any. Using a bread dough whisk, mix the ingredients just until combined. Let your dough rest for 30 minutes.
- Stretch and fold your dough one time, making about 4 to 5 rotations.
- Cover your dough and put in a warm place, such as your oven, overnight or about 8-12 hours. Your dough should double in size.
- In the morning, carefully scrape your dough out onto a floured work surface. Be careful not to deflate your airy dough. Gently shape the dough by pulling the dough towards you in a circular motion, tucking the sides and tightening the top to shape your boule'.
- Preheat your oven to 475°F with your Dutch Oven inside.
- Cover your boule' in a banneton or proofing basket to rise for 30 minutes while your oven and baking vessel preheat. This is your final rise and should not go over 30 minutes.
- Flip your Boule onto a piece of parchment paper and score your boule' 5 minutes before you are ready to bake it.
- When your Dutch Oven is preheated, carefully remove it from the oven.
- Transfer your boule' to your Dutch Oven. Cover it with the lid and replace it in the oven.
- Turn your oven down to 425° and bake for 20 minutes.
- After 20 minutes, carefully remove the hot lid and bake for another 20 to 25 minutes, until bread is at desired color.
- Carefully remove the Dutch Oven from the oven and gently turn the bread out onto a baking rack to completely cool.
Notes
- Using parchment paper during shaping can help to transfer the dough to a hot dutch oven and it helps keeps your work surface cleaner.
- Thouroughly dust the banneton or proofing basket to keep the dough from sticking.
- Proofing your dough inside your oven with the light on creates a nice warm, moist environment for your dough
- Scoring your bread tells your bread exactly where you want it to expand. Deeper scores keep your boule' from busting out in unwanted areas.
- Shallow scores are more for design.
- There are endless beautiful scoring designs online. Begin with some simpler ones to practice with.
Nutrition Information
Yield 24 Serving Size 1Amount Per Serving Calories 84Total Fat 0gSaturated Fat 0gTrans Fat 0gUnsaturated Fat 0gCholesterol 0mgSodium 163mgCarbohydrates 17gFiber 1gSugar 0gProtein 3g
Leave a Reply