

Learn how to sew simple DIY gingham café curtains to add a little cottage charm to your kitchen. This beginner-friendly sewing project is an affordable way to dress up a window with just a few basic supplies.
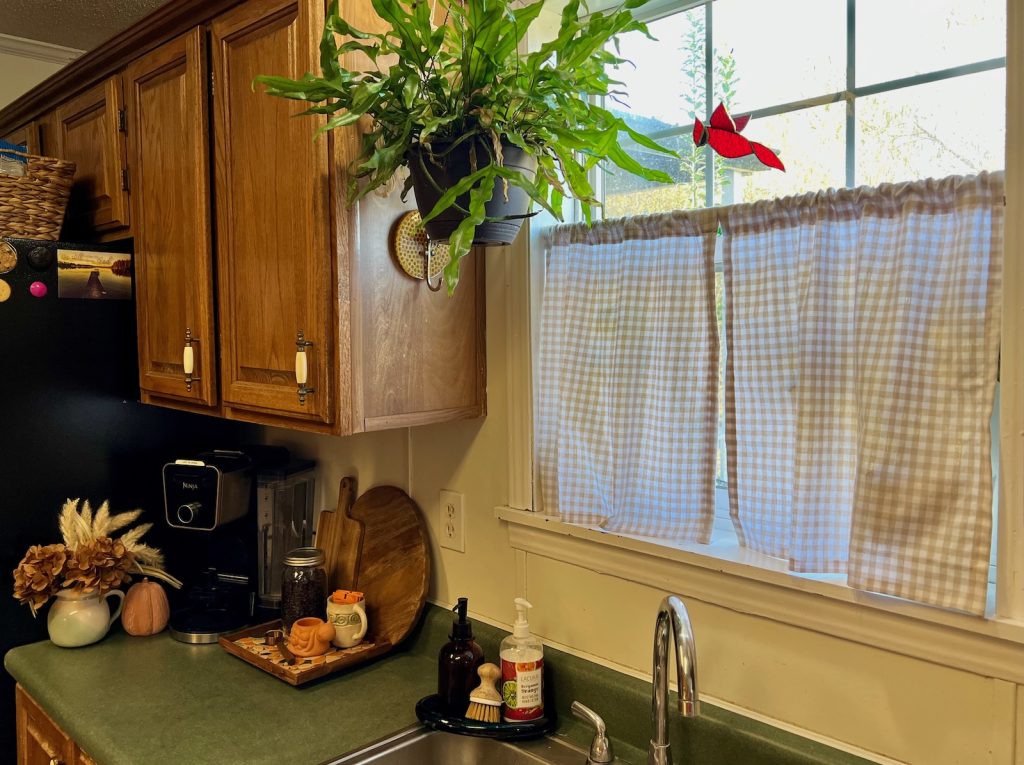
Sometimes it’s the smallest changes that make a room feel a little more like home.
Our kitchen isn’t anything fancy, and there are plenty of things I’d eventually like to change about it. But I’ve been wanting to make it feel a little softer and more inviting without spending a lot of money or taking on another big project.
One thing I kept coming back to was the kitchen window.
I love the look of old-fashioned café curtains, especially the simple gingham ones you might find in a cozy country cottage. They add just enough pattern and softness to a window without covering it completely.
So I decided to make my own.
These DIY gingham café curtains were surprisingly simple to sew, and I love how the neutral check adds a little cottage charm to our everyday kitchen.
If you have a sewing machine and can sew a straight line, this is a project you can tackle, too. Even if you can’t sew the straightest line, give this pattern a try. It’s low-commitment and very beginner-friendly.
I’ve been finding that little changes like these can make such a difference in how our home feels. If you’re looking for more simple, affordable ways to make your home feel inviting, I’ve shared a few of my favorites in my Cozy Fall Home article.
Why I Chose Gingham Café Curtains

There’s something timeless about gingham. It feels at home in a farmhouse kitchen, a French country cottage, or even a more traditional space.
I chose a soft beige-and-white gingham because I wanted something that would complement our kitchen without making the window feel too busy.
Café curtains are especially nice in kitchens because they provide some privacy while leaving the upper portion of the window uncovered. That means plenty of natural light can still come through.
And unlike full-length curtains, they don’t require much fabric.
Making them myself also meant I could choose the exact fabric and adjust the length to fit our window.
Supplies for DIY Gingham Café Curtains
You don’t need many supplies to make your own café curtains. If you already sew, you probably have most of these things on hand.
This post contains affiliate links. As an Amazon Associate, I earn from qualifying purchases. This means I may earn a small commission at no additional cost to you.
- Cotton gingham fabric
- Sewing machine
- Coordinating thread
- Fabric Scissors or rotary cutter
- Cutting mat and quilting ruler (optional)
- Measuring tape
- Iron and ironing board
- Sewing clips or straight pins
- Café curtain rod
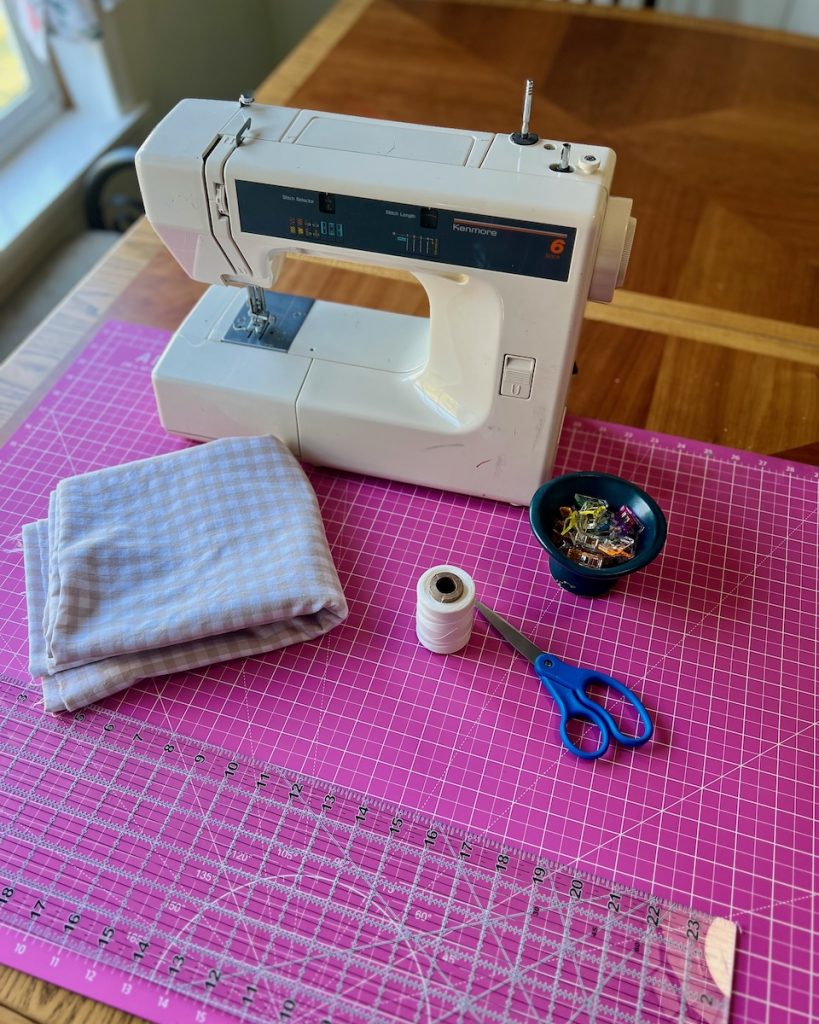
I used a neutral gingham fabric, but you could easily make these curtains with a small floral print, ticking stripe, or lightweight linen.
A note about fabric: Cotton is a good choice for this project because it’s relatively easy to cut, press, and sew. Prewashing and drying your fabric before cutting helps prevent unexpected shrinkage later.
How to Make DIY Gingham Café Curtains
This tutorial uses a simple rod-pocket design. Rather than adding curtain rings or tabs, you’ll sew a pocket along the top of each panel for the curtain rod.
The remaining edges are finished with basic hems.
Step 1: Measure Your Window
Before cutting your fabric, you’ll need to measure your window and determine how much fabric to use for each curtain panel.
Measure the Width
Start by measuring the width of the area where you plan to hang your café curtains.
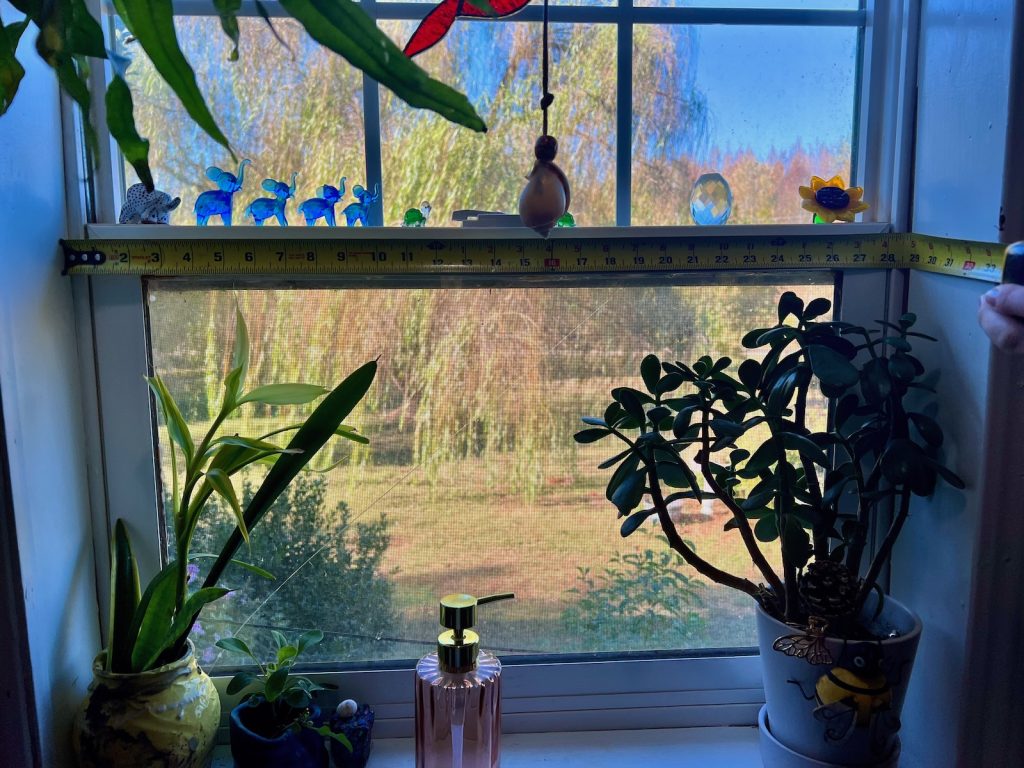
For a softly gathered appearance, plan for the combined finished width of your curtains to be approximately 1½ to 2 times the width of your curtain rod. To achieve fuller gathers, aim closer to twice the width.
For example, if your curtain rod spans 30 inches:
- For light gathering: 30 × 1.5 = 45 inches total
- For fuller gathering: 30 × 2 = 60 inches total
Divide your desired finished width by two to determine the width of each curtain panel.
Next, add 2 inches to each panel for the side hems. This allows you to fold each side edge over ½ inch, then another ½ inch, creating a clean, finished edge.
If you’re making fuller curtains for a 30-inch window, your measurements would be:
- Total finished curtain width: 60 inches
- Finished width of each panel: 30 inches
- Extra fabric for side hems: 2 inches per panel
- Cutting width: 32 inches per panel
Measure the Length
Next, decide how long you want your DIY gingham café curtains.
Traditional café curtains generally cover the lower portion of a window, leaving the top open for natural light.
Measure from where your curtain rod will sit to where you want the bottom of your curtains to fall.
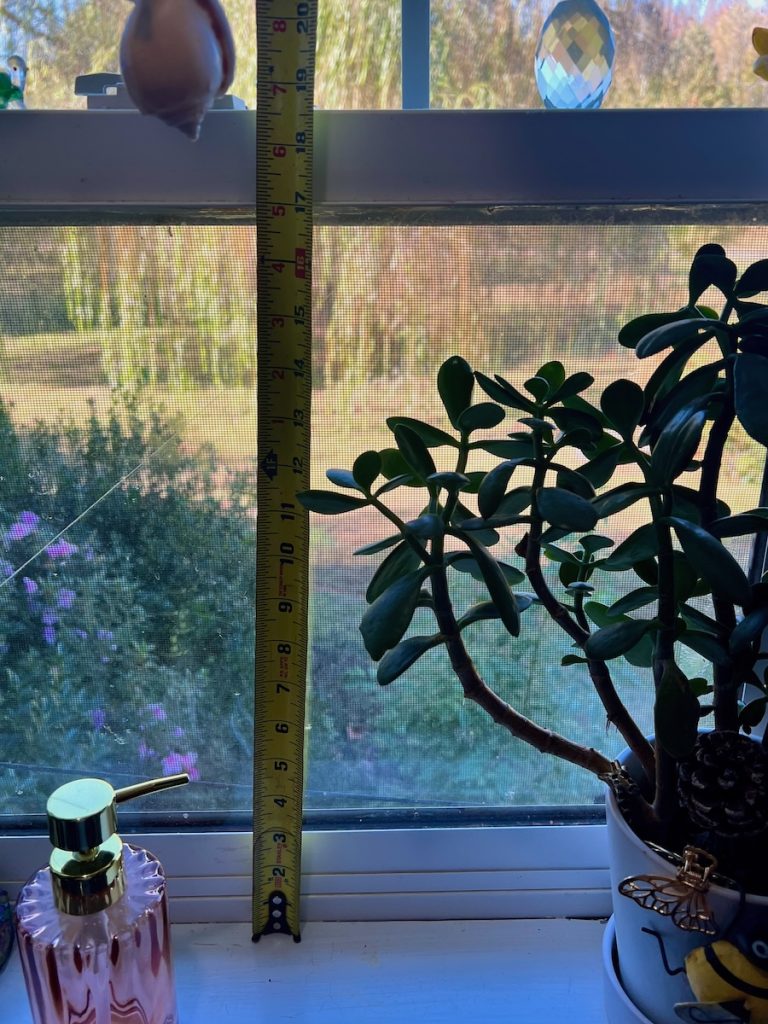
You’ll need to add extra fabric for the rod pocket and bottom hem.
For this tutorial, allow:
- Top rod pocket: 2½ inches (a ½-inch fold followed by a 2-inch fold)
- Bottom hem: 1 inch (two ½-inch folds)
For example, if you want your finished curtains to measure approximately 20 inches long:
- Desired finished length: 20 inches
- Extra fabric for rod pocket: 2½ inches
- Extra fabric for bottom hem: 1 inch
- Cutting length: 23½ inches
Using these example measurements, you would cut two fabric panels measuring 32 inches wide by 23½ inches long.
My Curtain Measurements
For my kitchen curtains, I used the following measurements:
- Window width: approximately 28½ inches
- Fabric width after washing: 43 inches
- Starting fabric piece: 43 × 24 inches
- Number of panels: 2
- Each panel cut to: 21½ × 24 inches
I originally chose to use less fabric because I wanted to save some of my gingham for another project. But after hanging the curtains, I realized the lighter gathering actually works really well for this particular window.
I love keeping plants on our kitchen windowsill, and the less gathered curtains leave a little more room for them without making the window feel crowded.
For other windows, though, I’d probably use closer to twice the window width for fuller, softer gathers. It really depends on the look you’re going for and how you use the space.to twice the window width for fuller, softer gathers. It really comes down to the look you’re going for and how you use the space.
Step 2: Cut Your DIY Gingham Fabric Panels
Once you’ve determined your measurements, lay your fabric on a large, flat surface. I used our dining table for this part of the project.
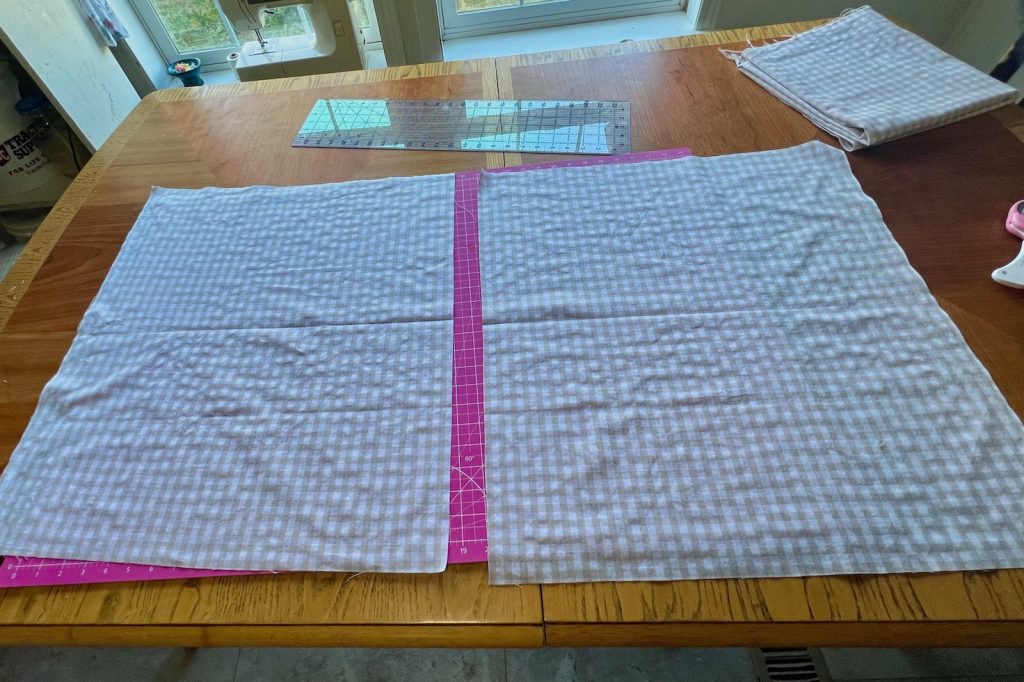
Important: Straighten Your Gingham Pattern Before Cutting
Before cutting your panels to size, take a little extra time to make sure your gingham pattern is straight. This is especially important when making curtains because crooked or mismatched checks can be noticeable once the panels are hanging side by side.
I paid extra attention to this step, even trimming away a little fabric along the edge to straighten the pattern before measuring and cutting my panels.
The gingham checks can be a helpful guide, but don’t assume the printed lines are perfectly aligned with the fabric grain. Smooth your fabric, check the pattern carefully, and use a ruler to make sure your edges are straight.
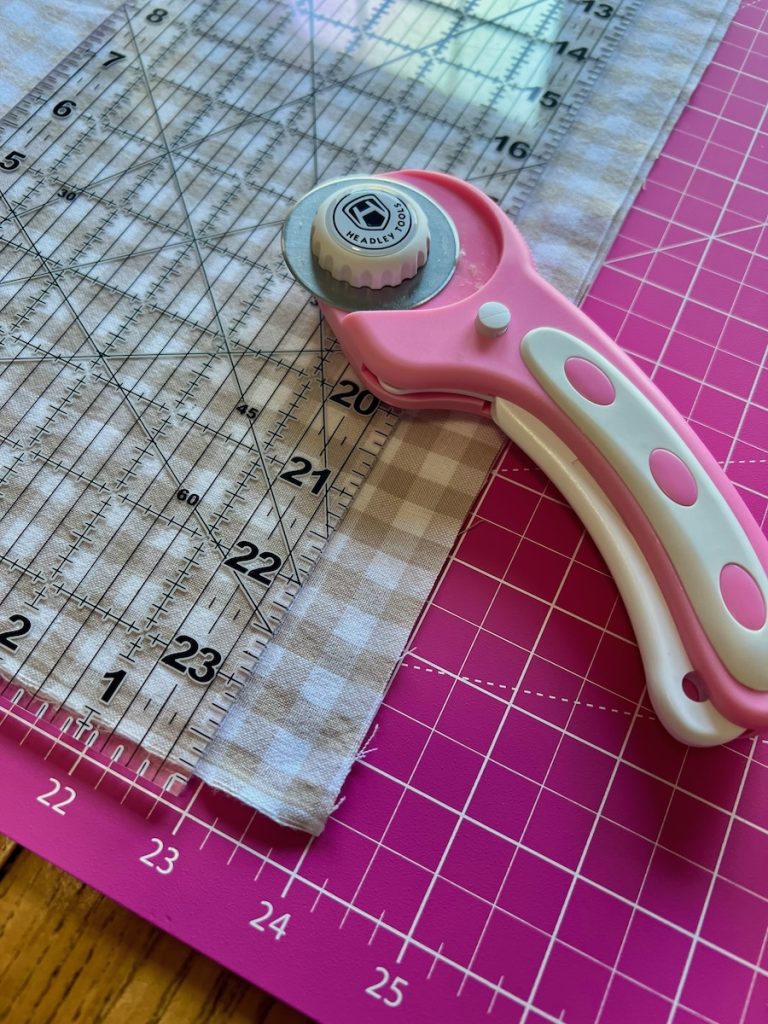
Once you’re satisfied with the alignment, measure and cut two equal-sized panels using the cutting measurements you calculated in Step 1.
Try to position the gingham pattern similarly on both panels so the checks line up as neatly as possible when the curtains are hanging.
Step 3: Press and Sew the Side Hems of your DIY Gingham Café Curtains
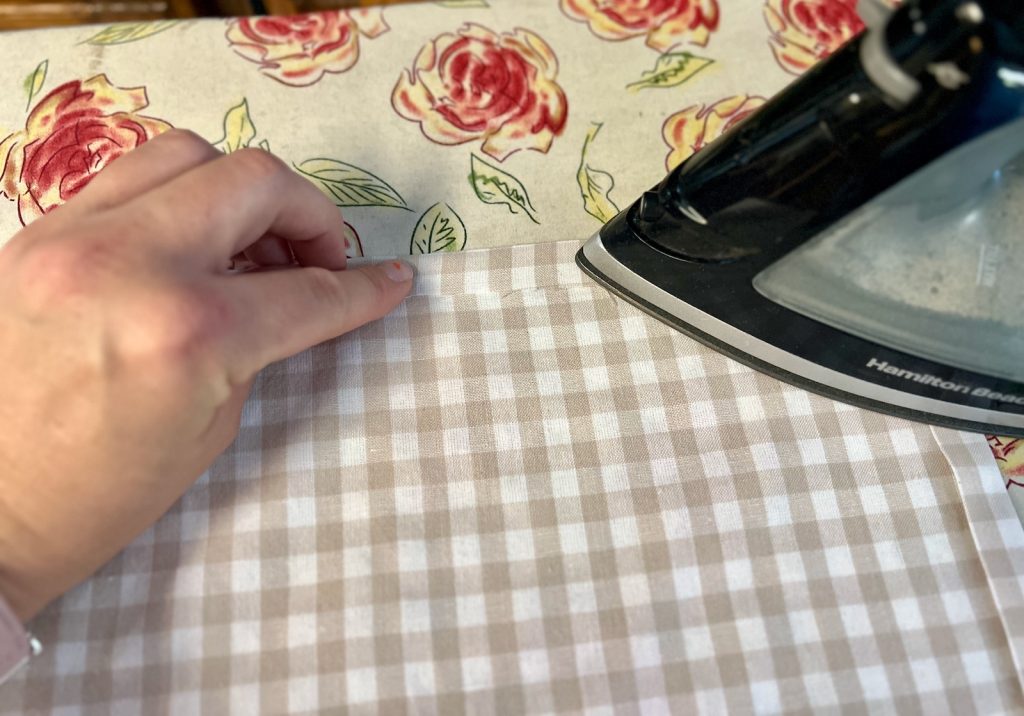
Before sewing, press the raw edges of your fabric to create neat hems.
Fold each side edge toward the wrong side of the fabric, then fold it over again to enclose the raw edge.
Press the folds with your iron.
This creates a clean, finished edge and helps keep the fabric in place while sewing.
A little tip for working with gingham: As I folded and pressed my hems, I used the checked pattern as a guide to keep everything straight and even. I paid attention to how the checks lined up along each fold, making small adjustments when needed. This helped me create neat, consistent hems and kept the pattern looking straight across both curtain panels.
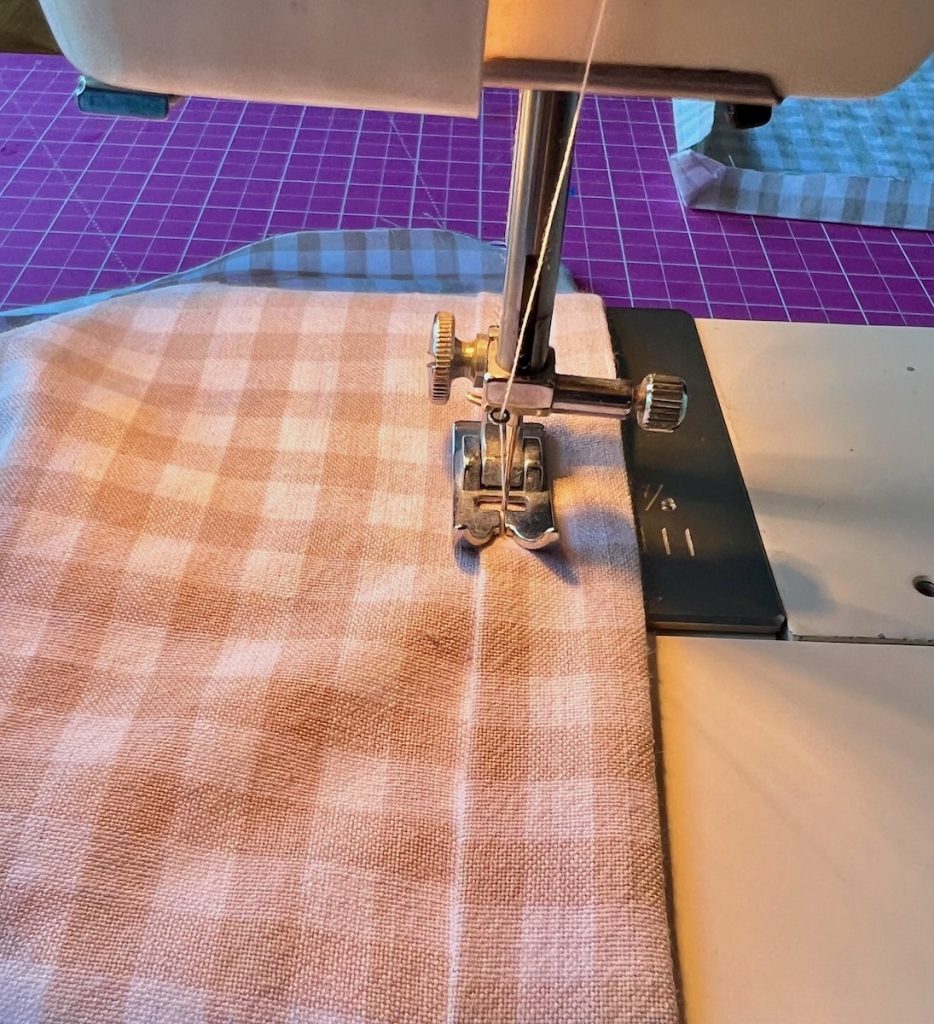
Using a straight stitch, sew along the inside folded edge of each side hem.
Take your time and guide the fabric gently through the machine.
Gingham is particularly forgiving for beginners because the checked pattern makes it easier to notice if your stitching begins to wander.
Repeat on the other curtain panel.
Step 4: Hem the Bottom of Each of your DIY Gingham Café Curtain
Next, finish the bottom edge of each panel.
Fold the bottom edge toward the wrong side of the fabric, press it, and fold it again to hide the raw edge.
Sew a straight line along the folded edge.
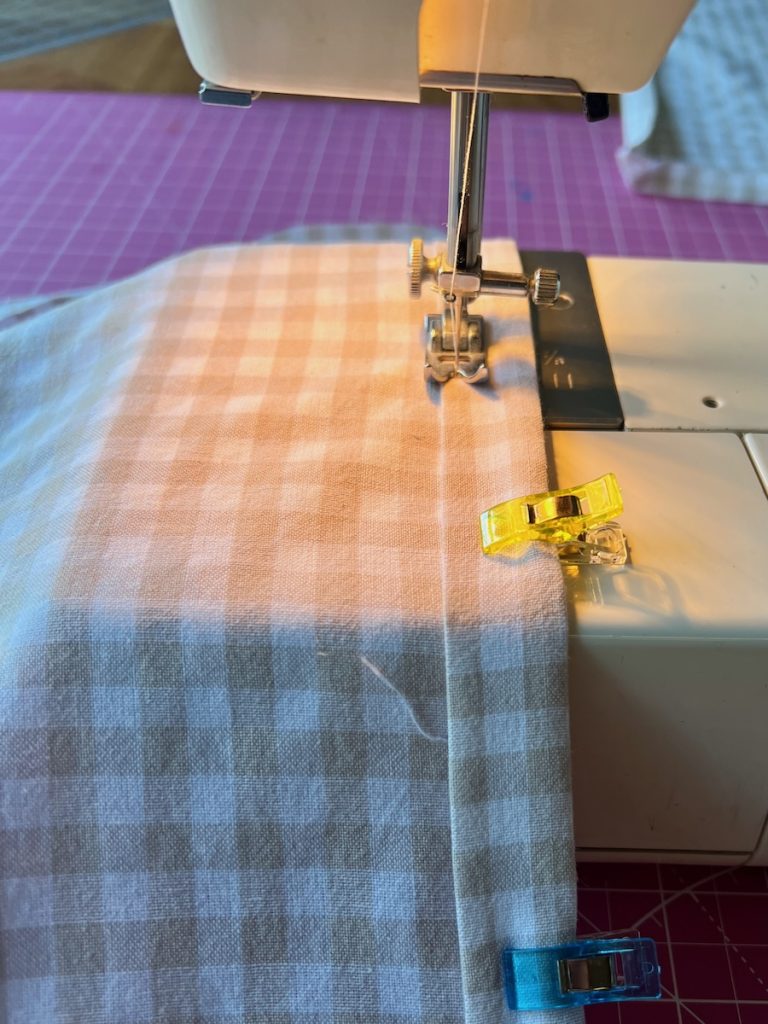
Try to keep the hem width consistent across both panels.
Once you’ve finished sewing, press the bottom hems again.
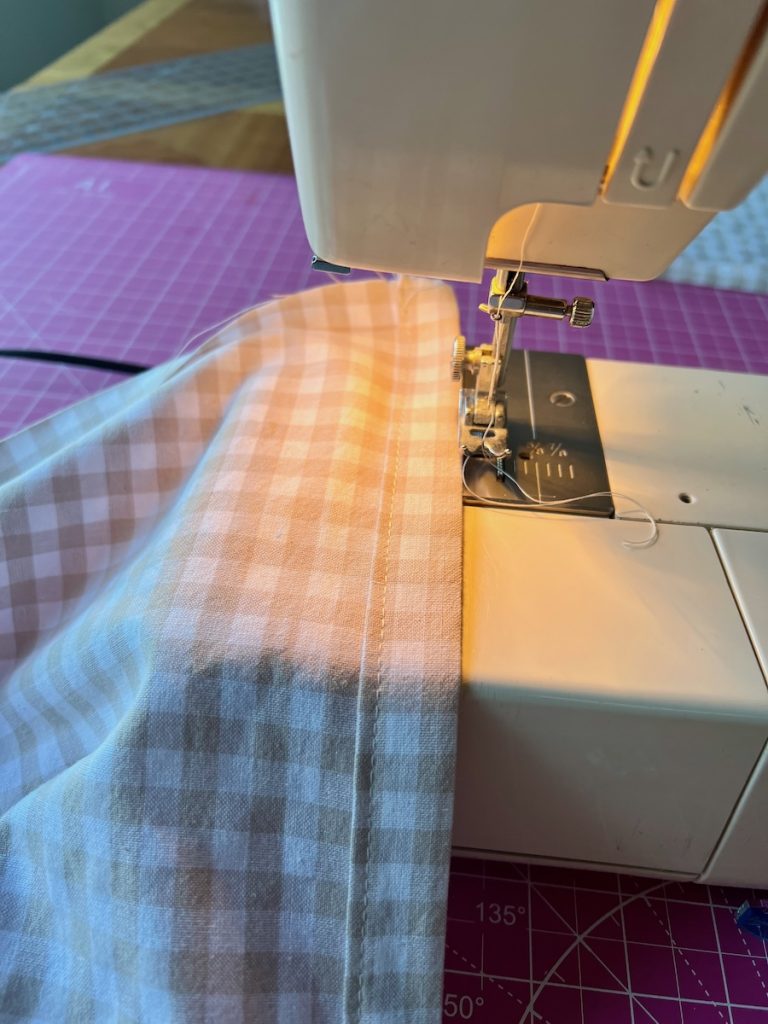
Pressing may seem like an unnecessary extra step, but it really does make a difference. It helps the seams lie flat and gives even a simple sewing project a more finished appearance.
Step 5: Sew the Rod Pocket
The rod pocket is what allows your café curtains to slide directly onto the curtain rod.
Start by folding the top raw edge of your fabric toward the wrong side by ½ inch. Press the fold with your iron.
Next, fold the top edge down another 2 inches to create the rod pocket. Press again to keep everything neat and in place.
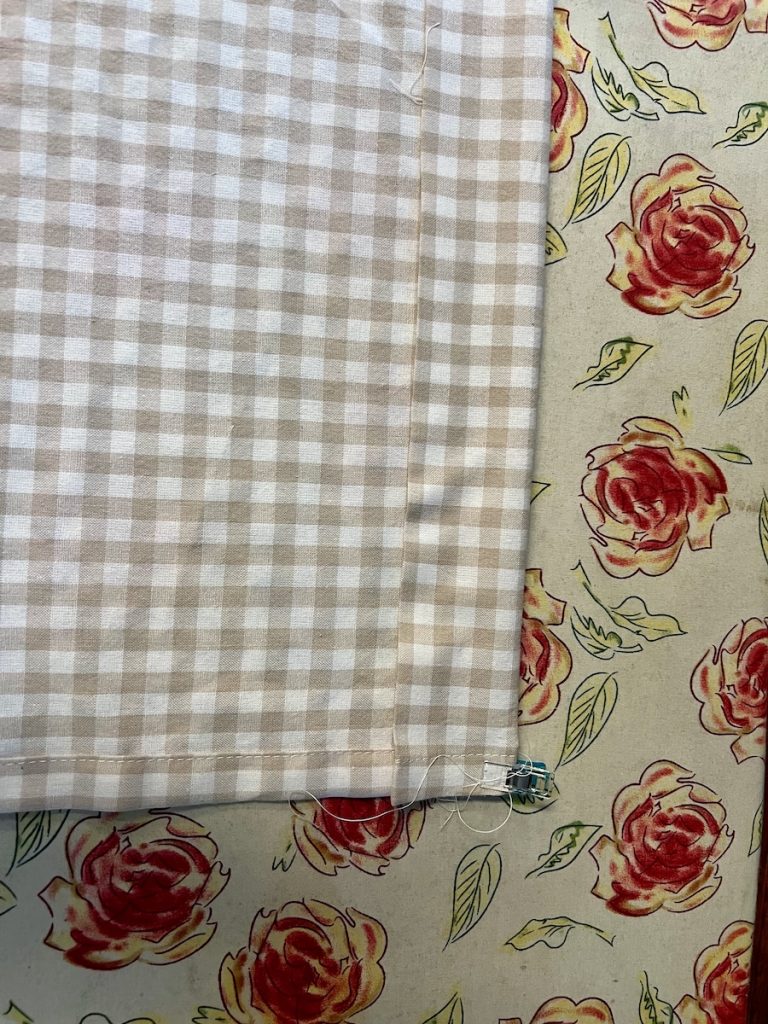
Before sewing, make sure your curtain rod will fit comfortably through the pocket.
Sew a straight line along the bottom folded edge, leaving both ends open so the curtain rod can slide through.
Repeat with the second panel.
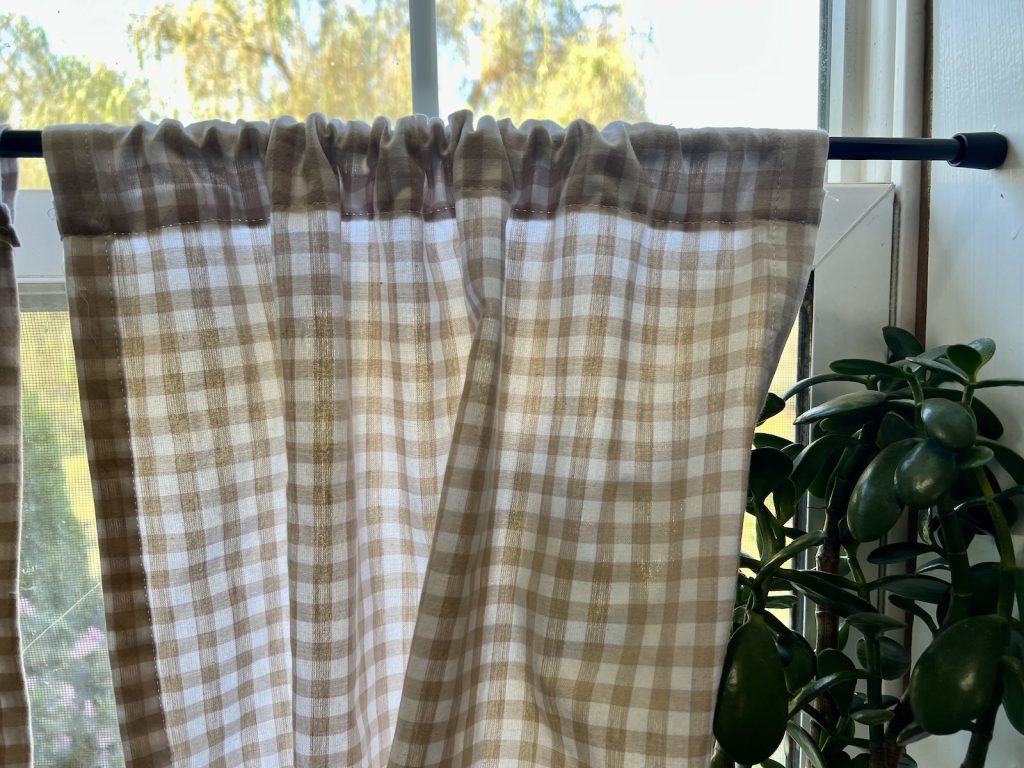
You should now have two curtain panels with finished edges and a pocket along the top.
Step 6: Give Your DIY Gingham Café Curtains a Final Press
Before hanging your curtains, give both panels one final pressing.
Pay particular attention to the side hems, bottom hems, and rod pockets.
This will remove wrinkles from handling the fabric and help your curtains hang more neatly.
Step 7: Hang Your New Café Curtains
Slide your curtain rod through the pocket at the top of each panel.
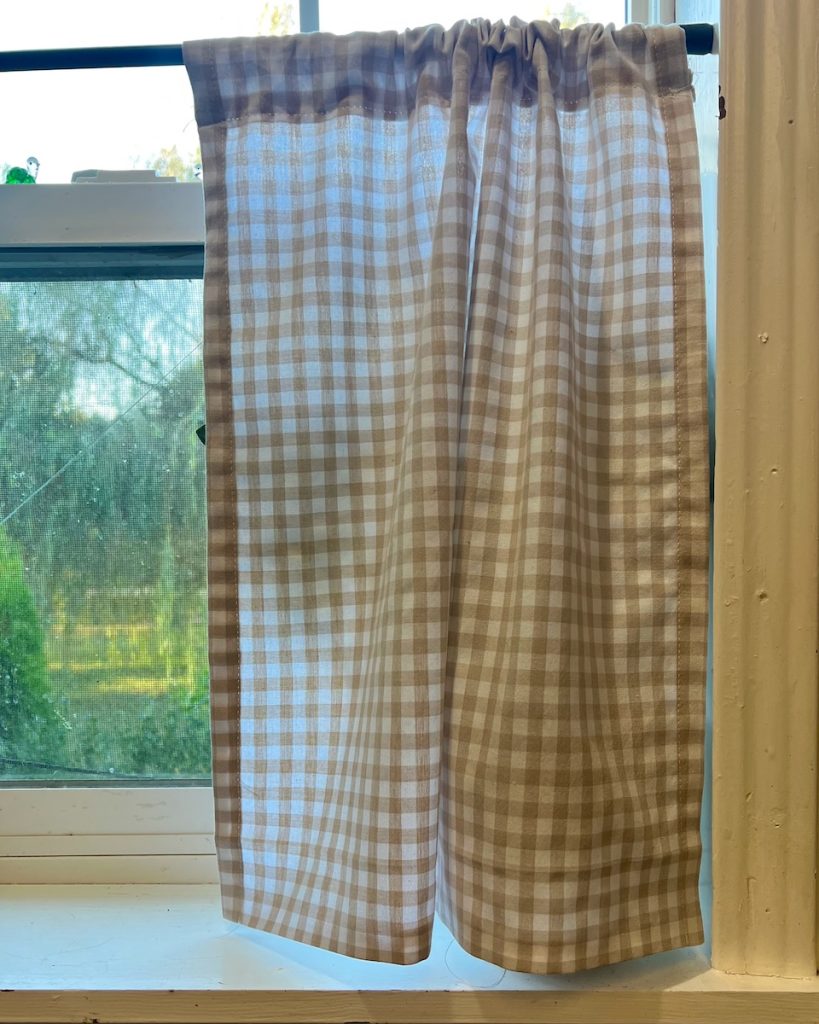
Arrange the gathers evenly, then hang the rod in your window.
Take a moment to adjust the fabric so both panels hang at the same length.
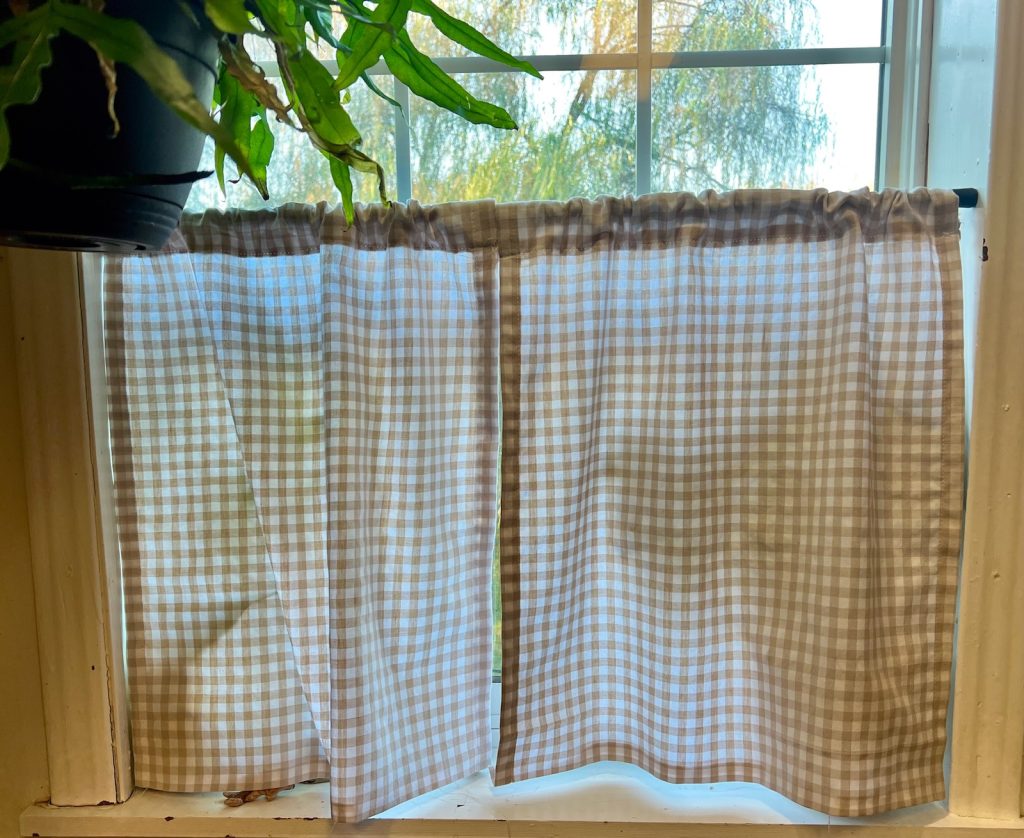
And that’s it!
With a little fabric and some simple straight stitching, you have a pair of handmade café curtains.
Tips for Sewing Café Curtains
If you’re new to sewing, here are a few things that can make this project easier.
Press as you go. Pressing each fold before sewing makes it much easier to create neat, even hems.
Check your measurements twice. It’s much easier to correct a measurement before cutting than after.
Pay attention to the pattern. Take your time when measuring and cutting gingham fabric. Straight, evenly aligned checks make a noticeable difference in the finished curtains, especially where the two panels meet.
Test your rod pocket before stitching. You want enough room for the curtain rod to slide through without pulling or bunching the fabric too tightly.
Don’t rush. This is a simple project, but taking a little extra time with the cutting and pressing will make a difference in the finished curtains.
An Easy Way to Add Cottage Charm to Your Kitchen
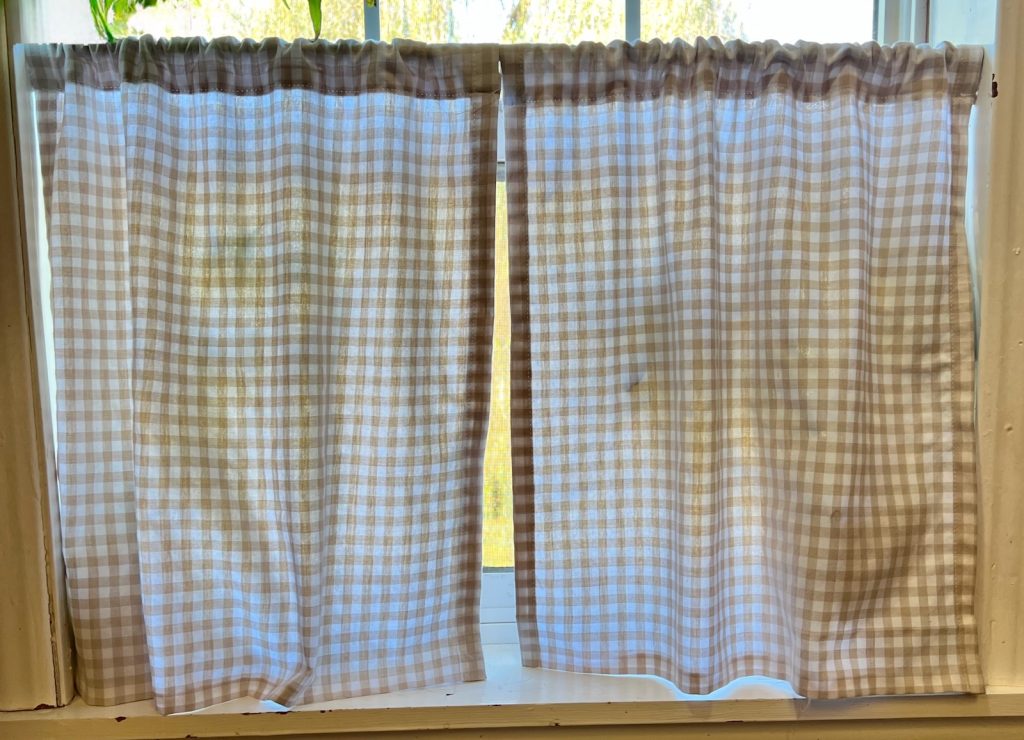
I think one of the things I love most about decorating a home is that it doesn’t always require a complete makeover.
Our kitchen still has its dated features, and there are plenty of improvements on my wish list. But these little gingham curtains have made the window feel softer and more finished.
They’re simple, practical, and just the sort of old-fashioned detail I love.
And because I made them myself, they feel a little more special than something I could have picked up at the store.
Whether your style leans farmhouse, cottage, or traditional, sewing your own café curtains is an easy way to bring a little warmth and personality into your home.
If you enjoy creating cozy little corners in your home, you might also enjoy my post about creating a Cozy Fall Home Café with simple, thoughtful touches.
Nourishing the Heart
It’s easy to look around our homes and notice all the things we’d like to change.
The outdated cabinets, unfinished projects, or rooms that don’t quite look the way we imagine they should.
But creating a welcoming home doesn’t have to wait until everything is finished.
Sometimes it happens in the small, ordinary things: a little fabric sewn into curtains, sunlight coming through the kitchen window, or taking the time to make something beautiful with our own hands.
Colossians 3:23 reminds us:
“Whatever you do, work heartily, as for the Lord and not for men.” (ESV)
Even the ordinary work of caring for our homes can be done with love and purpose.
A beautiful home isn’t necessarily a perfect one. It’s a place where we can faithfully care for the people God has entrusted to us.
And sometimes a simple pair of handmade curtains is a lovely reminder of that.



Leave a Reply